Configuration Guide
Overview
This guide describes how to configure and manage the Infinidex add-on in Confluence.
Pre-requisites
You must have installed Infinidex as per the Installation Guide and be logged in as a Confluence System Administrator.
Also, please make sure that your system is supported by Infinidex.
Instructions
Locating the Infinidex Configuration Interface
Once Infinidex has been installed as per the Installation Guide, the next step is to configure the add-on to support your network shares.
Configuration of Infinidex is performed through the Infinidex Configuration Interface, which is available in the Confluence backend as follows:
-
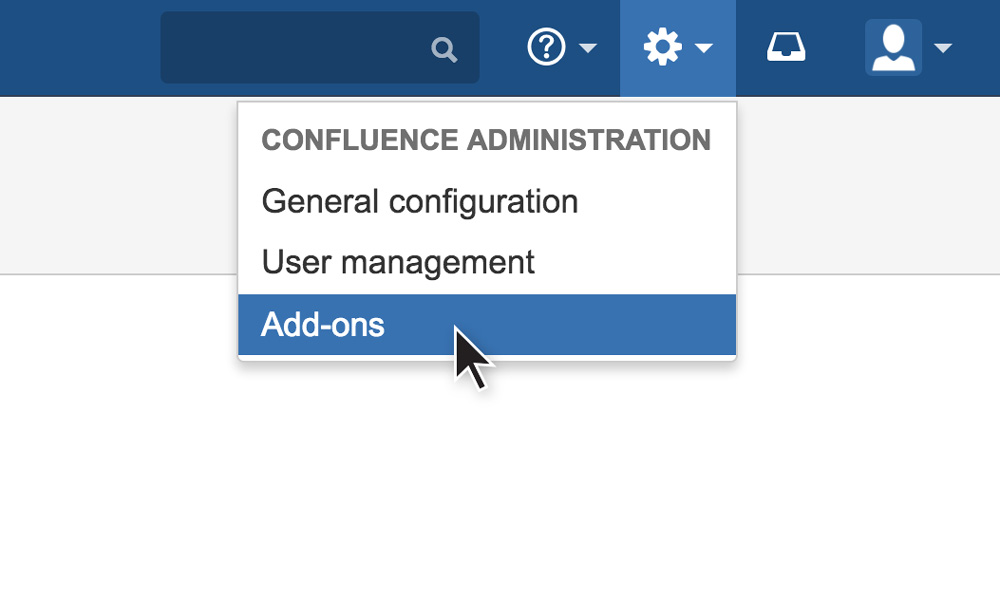
If you’re in the frontend, start out by navigating to the backend. You can do this from the frontend by clicking the cog-icon, and clicking Add-ons (as shown in the screenshot)
-
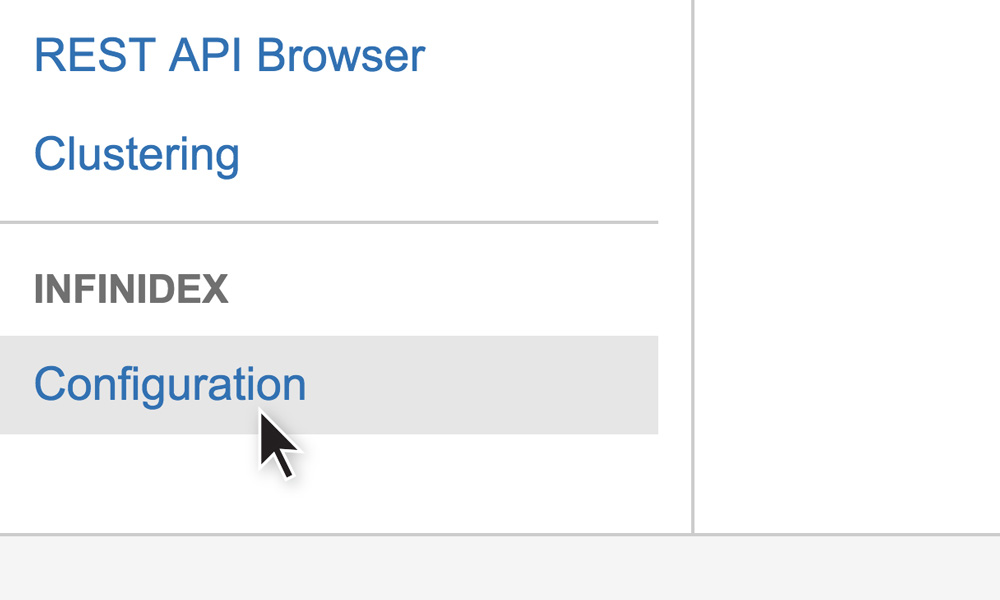
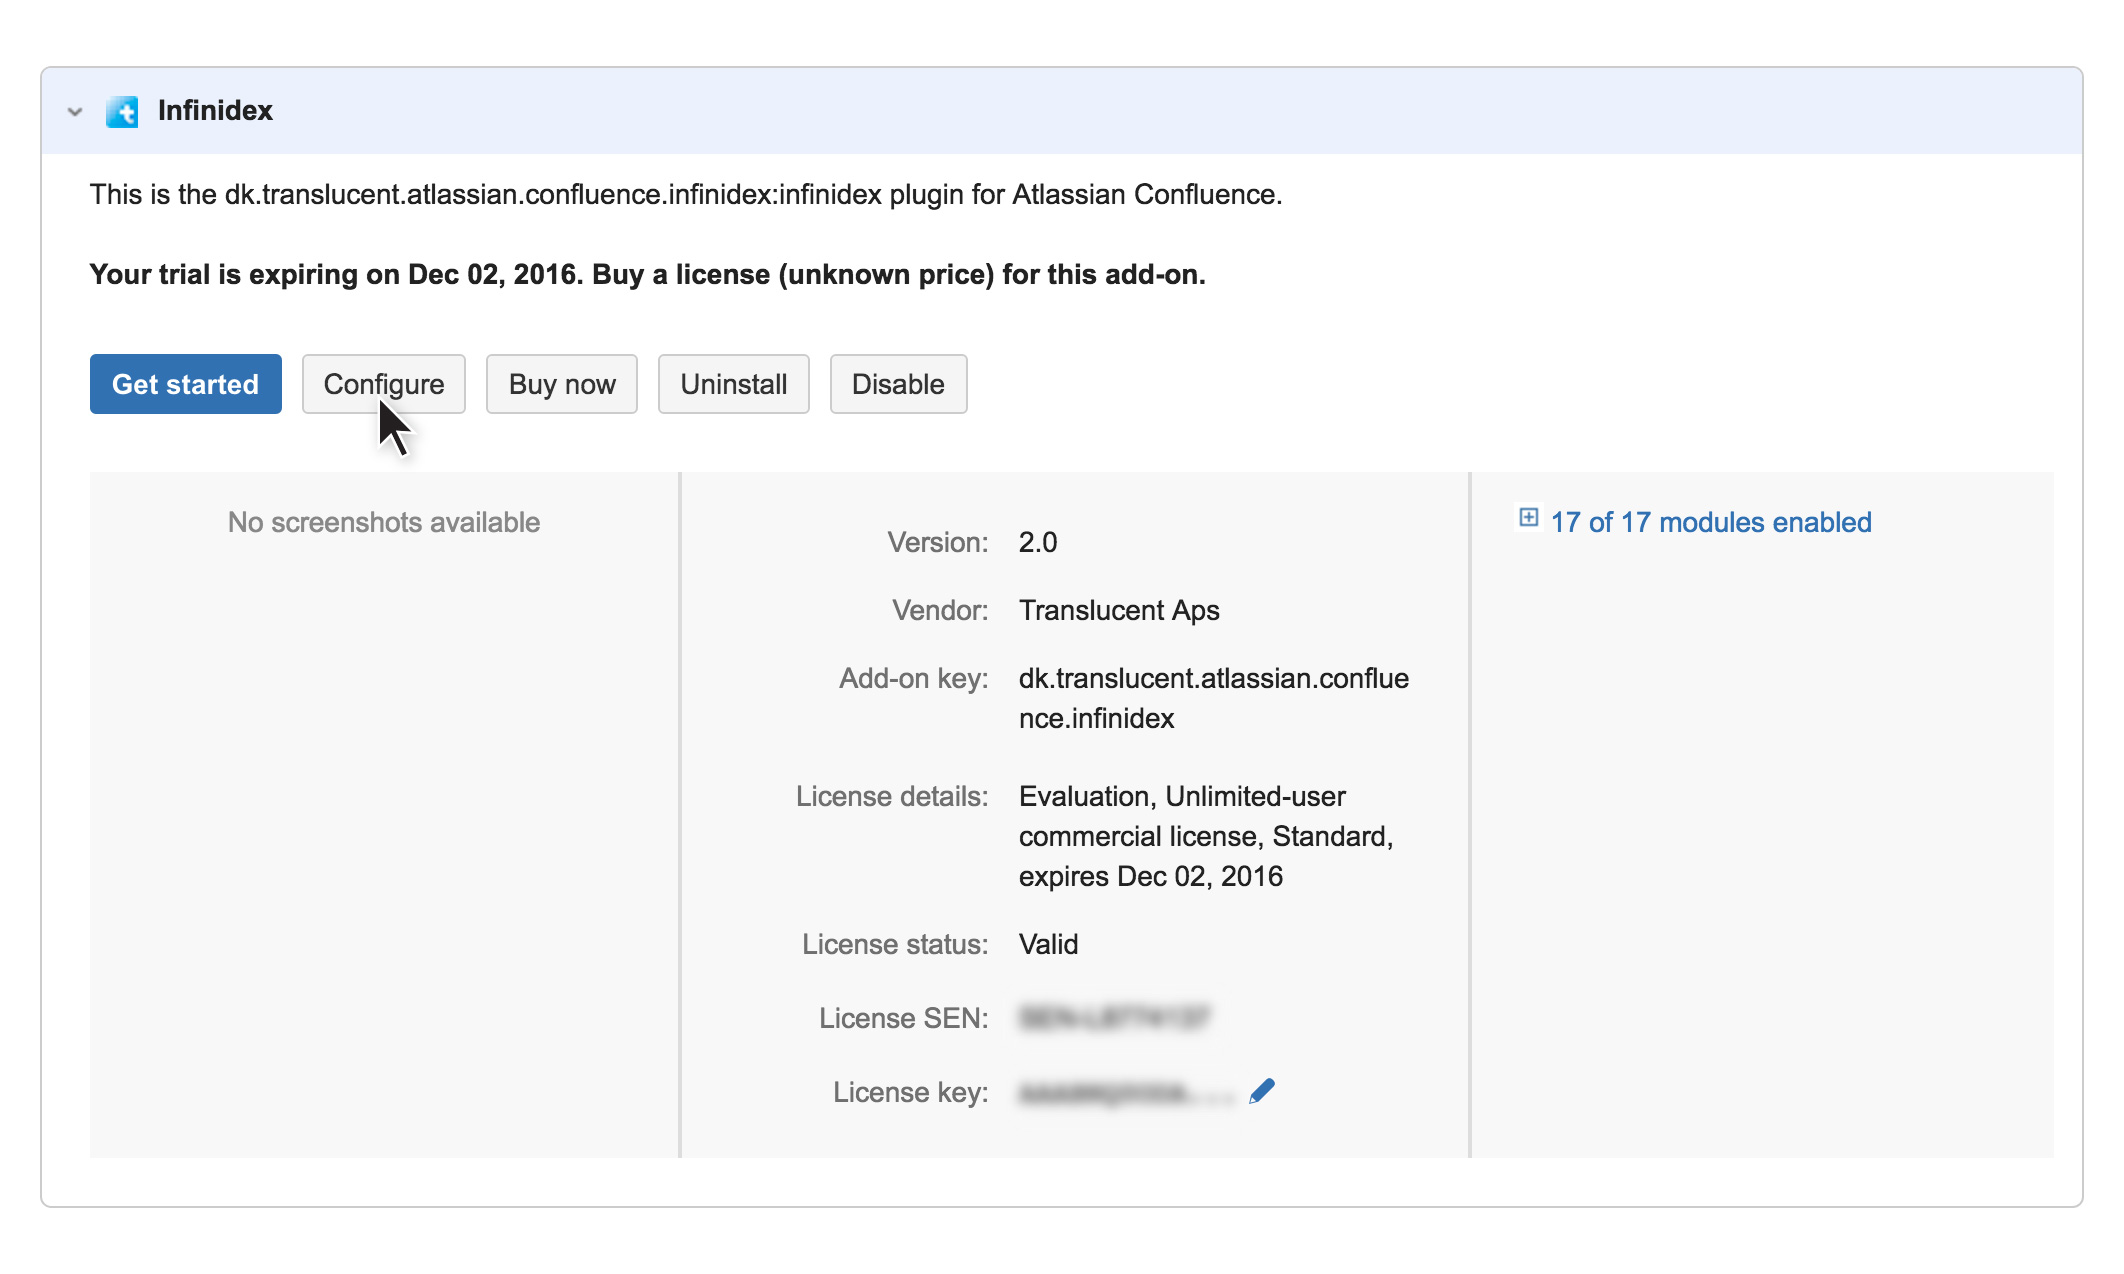
Once in the backend, locate the INFINIDEX section in the left navigation column, and click Configuration to open the Infinidex Configuration Interface
Using the Infinidex Configuration Interface
The Infinidex Configuration Interface is where you configure which shares are to be made searchable (indexed) by Infinidex
Making a network share searchable entails indexing it, which means that Infinidex will periodically scan the contents of the network share and build an efficient search index of all the files and their contents found there.
Please note that Infinidex indexes all content on the network shares that are configured in Infinidex. As much, as this can be a convenience to some, to others it can be a potential information security risk, so choose your indexed paths carefully.
Configuring Searchable Network Shares
Configuring network shares to be searchable by Infinidex is done in a two-step process:
-
Mount any network shares that you would like Infinidex to access onto the server running Confluence (for operating system-specific guides, you may consult our FAQ)
-
Make configuration entries for each of the shares you wish to have searchable in the Infinidex Configuration Interface
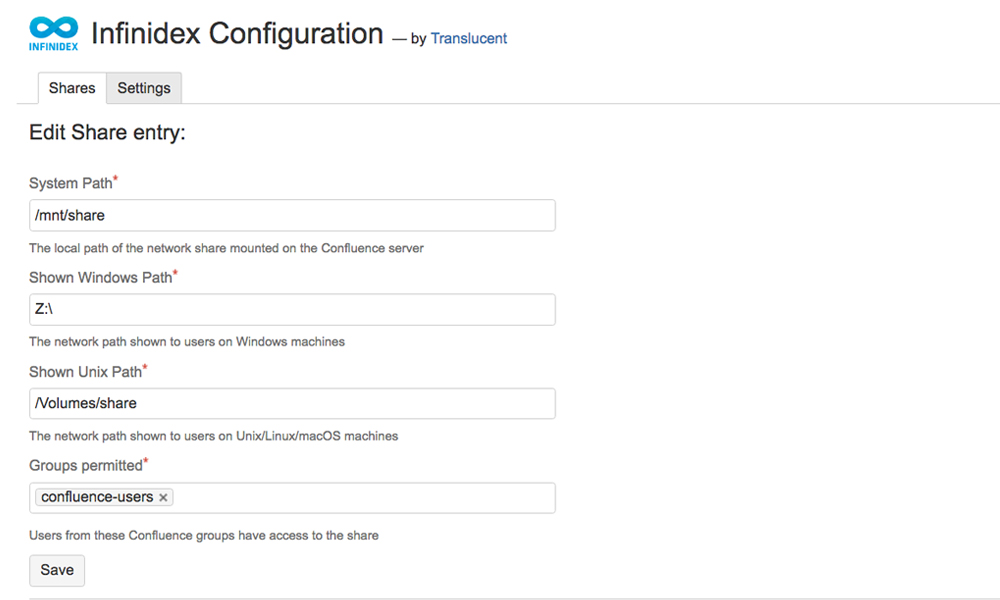
Making a configuration entry for a share is easy. However, be aware that there are three distinct fields to be filled-in (as depicted in the following illustration and detailed further below):
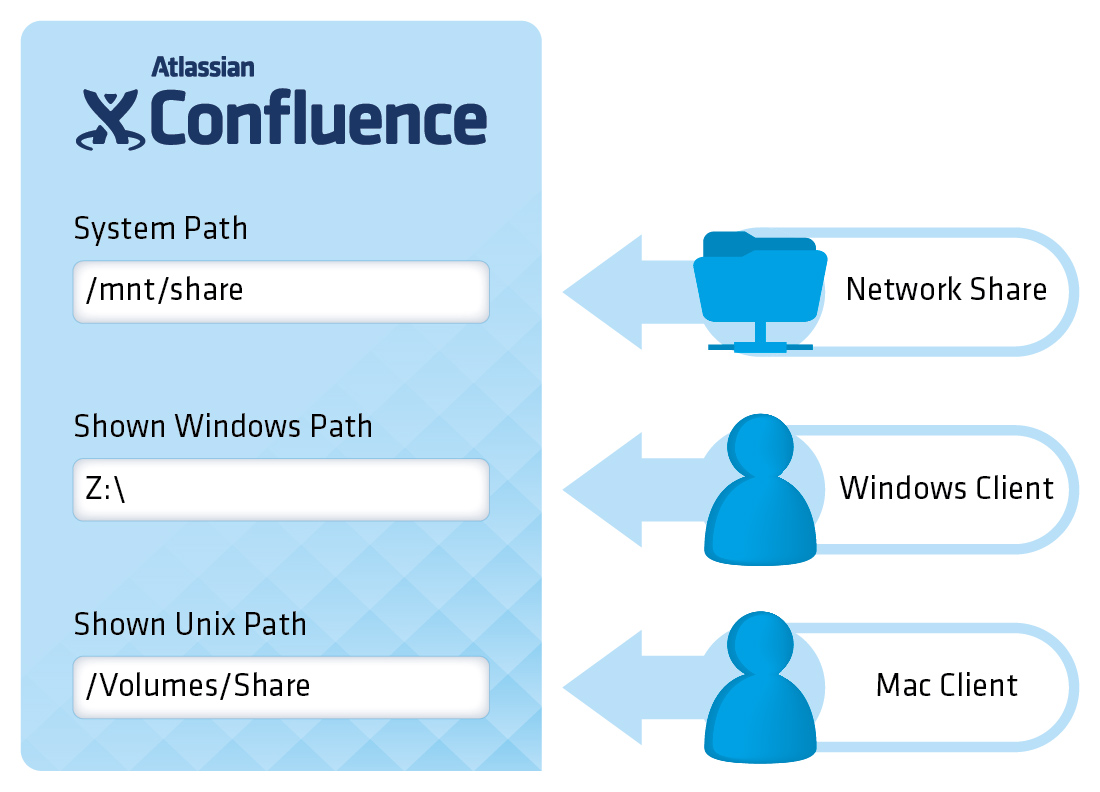
The meaning of the fields is as follows:
-
The System Path field points to the path on the Confluence server where the network share is located
-
The Shown Windows Path is the path shown to Confluence end-users, if they are working from a Windows-based computer
-
The Shown Unix Path is the path shown to Confluence end-users, if they are working from a macOS-based computer
When completed, please refer to the User Guide for information on how to perform searches.
Configuration Example #1: Confluence on a Linux-server and end-users on Windows
Infinidex is installed on a Confluence server running Linux. On the Linux server, a network share is mounted as /mnt/share/budgets. End-users only running Windows have mounted the same network share as the local network drive Z:\.
An administrator now wishes to configure Infinidex to make the network share searchable by Confluence end-users, and does the following:
- Types
/mnt/share/budgets/into System Path - Types
Z:\into Shown Windows Path - Leaves the Shown Unix Path empty
- Clicks Add
Configuration Example #2: Confluence on a Windows-server and end-users on Windows and macOS
Infinidex is installed on a Confluence server running Windows. On the Windows server, a network share is mounted as Z:\. End-users running a mix of macOS and Windows will be accessing the same network share as /Volumes/budgets and Z:\, respectively. On the end-users’ machines, the network shares have been mounted as such.
An administrator now wishes to configure Infinidex to make the network share searchable by Confluence end-users, and does the following:
- Types
Z:\into System Path - Types
Z:\into Shown Windows Path - Types
/Volumes/budgets/into Shown Unix Path - Clicks Add
Indexing Scheduling
Using Infinidex, you may specify an indexing interval that is optimum for how your organization uses Infinidex and how it wishes to balance performance vs. staleness of data.
You may experiment as you choose. We recommend setting the initial indexing interval to 60 minutes, observing system performance, and working your way out from there.


